Hello everyone:
Hoy vengo a enseñaros el segundo proyecto de inspiración para el reto de Ching Chou Kuik de septiembre
Time to show you my second inspiration project for the current challenge at Ching Chou Kuik´s challenge blog.
Esta semana el equipo de diseño tenía como requisito que apareciese en su trabajo mariposas o insectos, así que he usado una bonita imagen llamada "Hello dragonfly" que podéis encontrar aquí.
This week the DT members had to use butterflies or insects, so I´ve decided to showcase a beautiful image called "Hello Dragonfly" that can be found here
This week the DT members had to use butterflies or insects, so I´ve decided to showcase a beautiful image called "Hello Dragonfly" that can be found here
La imagen está coloreada con rotuladores Copic y algunos toques de bolígrafos de gel (en la libélula).
El fondo está coloreado por medio de las tintas de las recargas (Copic Various Inks) y blender (la recarga del número 0, pero se puede usar también alcohol del de farmacias) dejando caer gotas con cuidado de que la tinta no tocase el dibujo al expandirse. Luego lleva toques de Stickles en tono "Mercury Glass" (ya sabéis que uso mucho los Stickles de Ranger).
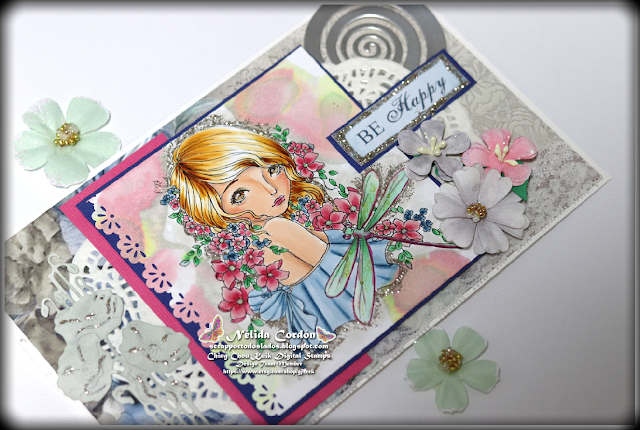
The image is coloured with Copic markers and some details with gel pens (mainly the dragonfly).
The background is coloured with Copic Various Ink and blender (you can also use alcohol) , very careful dropping on the panel. After that, I have applied "Mercury Glass" Stickles from Ranger (you know I use the Stickles a lot).
Una vez seco el fondo troquelé el lado izquierdo con una troqueladora de bordes y coloqué el panel de la imagen encima de dos cartulinas texturizadas (una en azul marino y otra en fucsia)
Once everything is dry, I used a border punch on the left of the panel and placed it on top of two cardstock ( navy blue and fuschia).
En cuanto al diseño, encima de la base de la tarjeta hay un precioso papel decorado de la colección "Broccato Estense" de Ciao Bella y sobre éste coloqué una delicada blonda en blanco roto y varios troquelados (enviados por mis compañeras de equipo), una cinta de encaje y unas flores de papel (la más grande es de Prima y las otras dos las he hecho yo).
Regarding the design, on top of the white card base, I´ve placed a beautiful decorated paper from the "Broccato Estense" collection by Ciao Bella and on top of this a delicated doily in off white, also some die cuts my team partners sent me on my Birthday.
A white lace, some paper flower (most of them hand made) are the final elements of the project.
El sentimiento, "be happy" (se feliz) también es de la colección de papeles "Broccato Estense".
Por allí y por allá otros toques de Stickles (¿quizás demasiados?)
The sentiment "be happy" is also from the "Broccato Estense" collection. Some touches of Stickles here and there (maybe too much?)


No hay comentarios:
Publicar un comentario