
Hola a todos:
Hello everyone:
El mes de Enero comienza en Ching Chou Kuik con el reto: "New beginnings" (nuevos comienzos). Entendiendo tales como: Nuevo trabajo, o nuevo hogar, nuevo material utilizado...Por supuesto también, Año nuevo, que es el tema de mi proyecto de inspiración.
January has begun at Ching Chou Kuik with the challenge: "New beginnings".(Eg: New job, new baby, new crafty stash, and of course, New Year, the theme of my inspiration project).
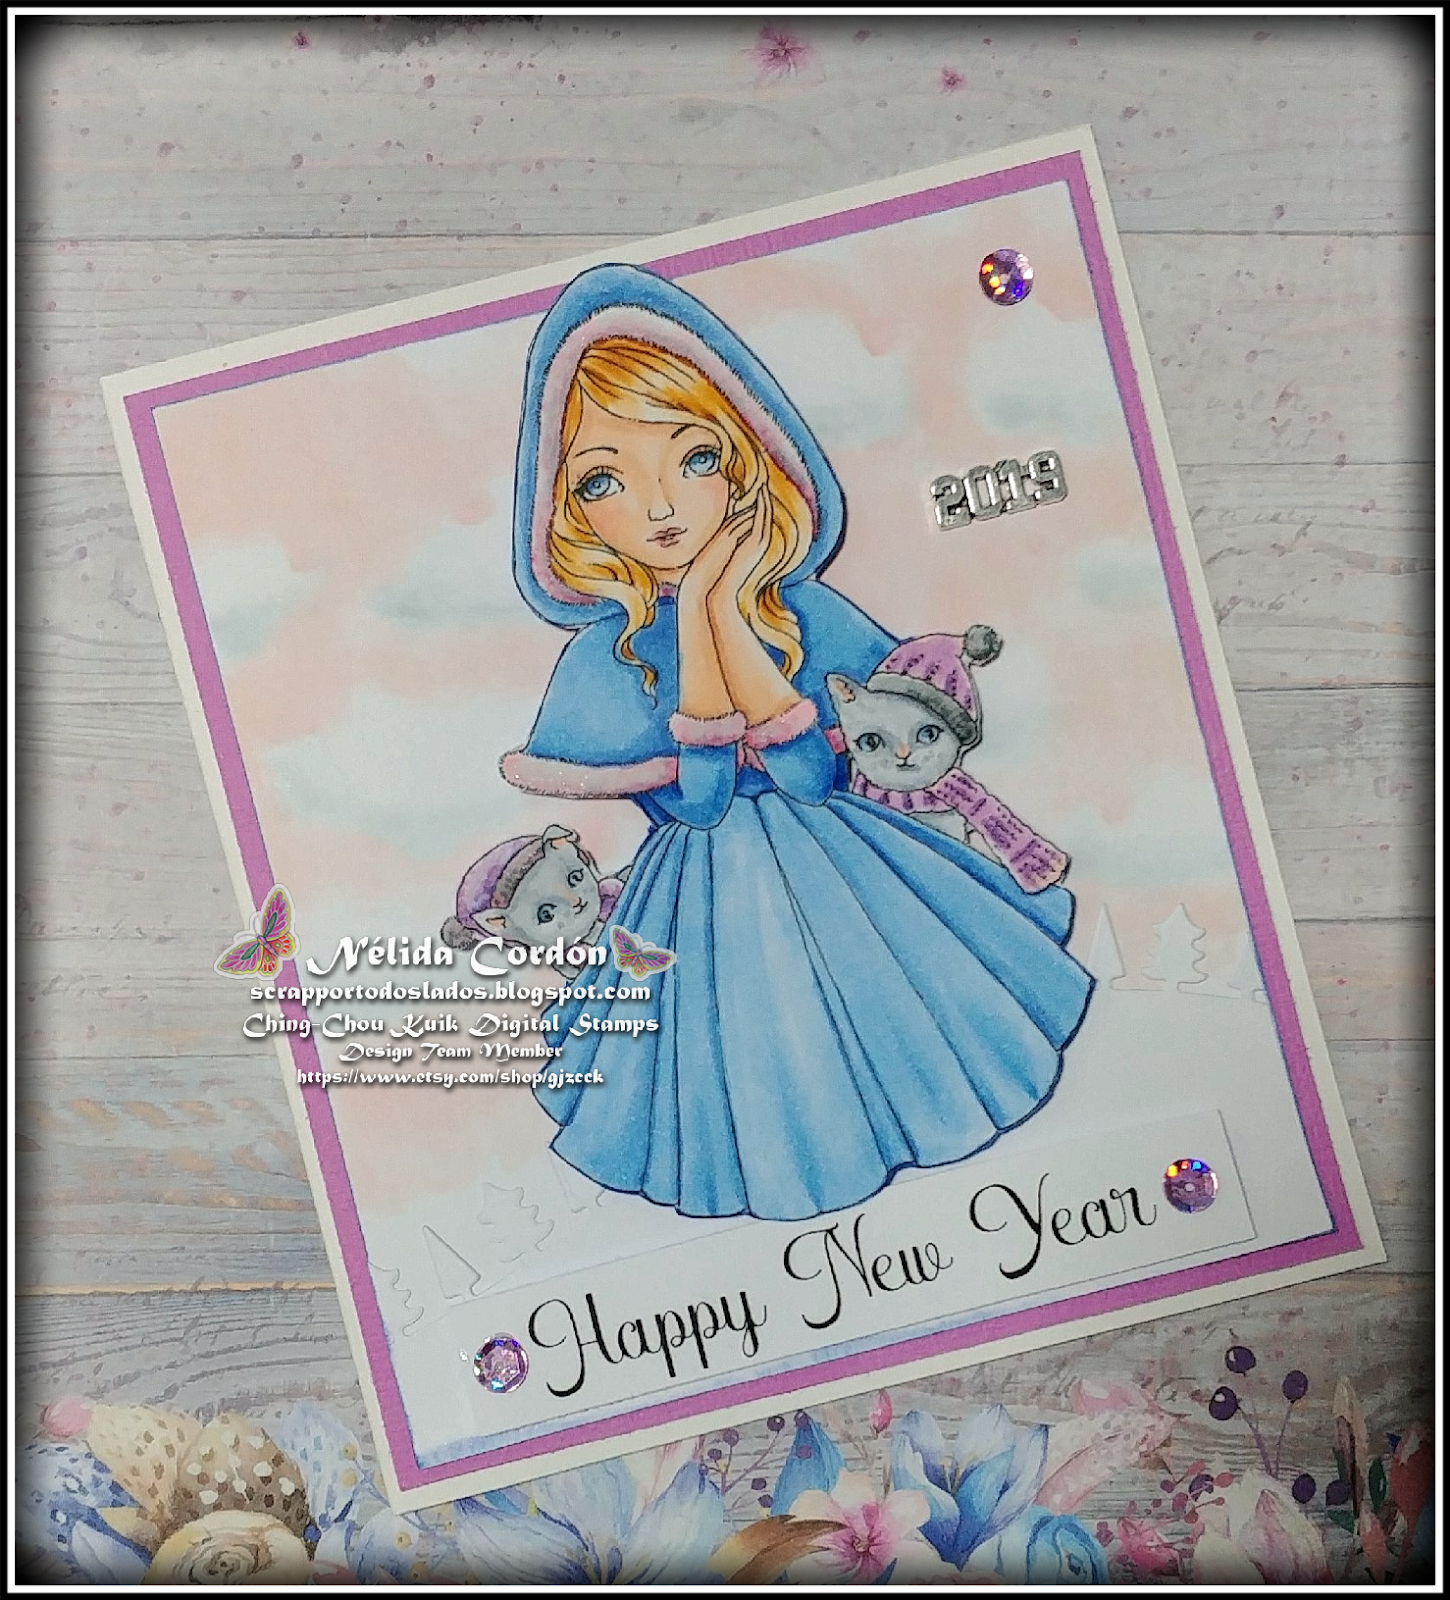
La imagen que he utilizado en esta ocasión se llama "Winter cuddle" y la podéis encontrar aquí.
The image I´ve chosen on this occasion is called "Winter cuddle" and you can find it here.
Tanto la imagen como el fondo están coloreados con rotuladores Copic. Me apetecía hacer un fondo suave de nubes rosas que sirviese para enmarcar y resaltar esta dulce estampa: Comienzas "dibujando" el contorno exterior de las nubes con tu tono intermedio, en este caso el R00. Una vez estás conforme con el tamaño y forma de tus nubes, rellenas todo el fondo restante con tu tono más claro ( en mi caso el R000 ) y después remarcas partes del contorno de las nubes con el tono más oscuro (R02).
Both the image and the background are coloured with Copic markers. I wanted to make a soft background of pink clouds to frame and highlight this sweet digi: You begin "drawing" the cloud´s outline with your medium colour (R00 for me). Once you are satisfied with the shape and size of your clouds, you fill the rest of the background with you lightest colour (R000), after that you remark some borders of the clouds with the darkest colour (R02).
Ya en el interior de las nubes, en la parte inferior, aplicas BG70 y C1 y por último y muy importante, blender a todo el conjunto.
Yo aprendí a hacer este fondo gracias a Virginia de "Mi pequeño tesoro", que hizo un tutorial para Copic marker Spain.
The inside of the clouds are coloured with BG70 and C1, The last but very important step is apply blender (0) to the whole background.
I learned to make this kind of backgrounds from Virginia of "Mi pequeño tesoro", who made a tutorial for Copic marker Spain
Para seguir con el diseño de la tarjeta, troquelé un valle con abetos ( troquel muy conocido de Lawn Fawn) y lo pegué sobre el panel con las nubes.
La imagen está colocada sobre el panel con unos cuadrados de foam adhesivo, para resaltarlo más por medio del volumen.
Regarding the design, I die cut a valley with fir trees ( a very well known die from Lawn Fawn) and I placed it on the cloud panel. The image is placed on the panel with squares 3D foam too.
Imprimí el"Happy New Year" ( Feliz Año Nuevo) y lo coloqué sobre el panel también con cuadrados de 3d foam.
After that, I printed the "Happy New Year" and placed it on the panel with squares 3d foam.
Pegué el panel a una cartulina texturizada y ésta a la base de la tarjeta.
The panel is placed on a textured cardstock and this one on the card base.
Me parecía que el troquelado del fondo no sedistinguía apenas, así que le apliqué Stickles de Ranger en tono dorado.
The die cut was not sufficiently highlighted so I applied golden Stickles.
 |
| Resultado final/Final version |
Tres lentejuelas y un metálico 2019 terminan el diseño.
Three sequins and a metallic 2019 to finish the design.
Espero que os haya gustado, muchas gracias por visitarme, nos "vemos" pronto.
I hope you like my inspiration project, thanks for the visits and I´ll "see" you soon.
Un abrazo/hugs

Nélida
No hay comentarios:
Publicar un comentario